



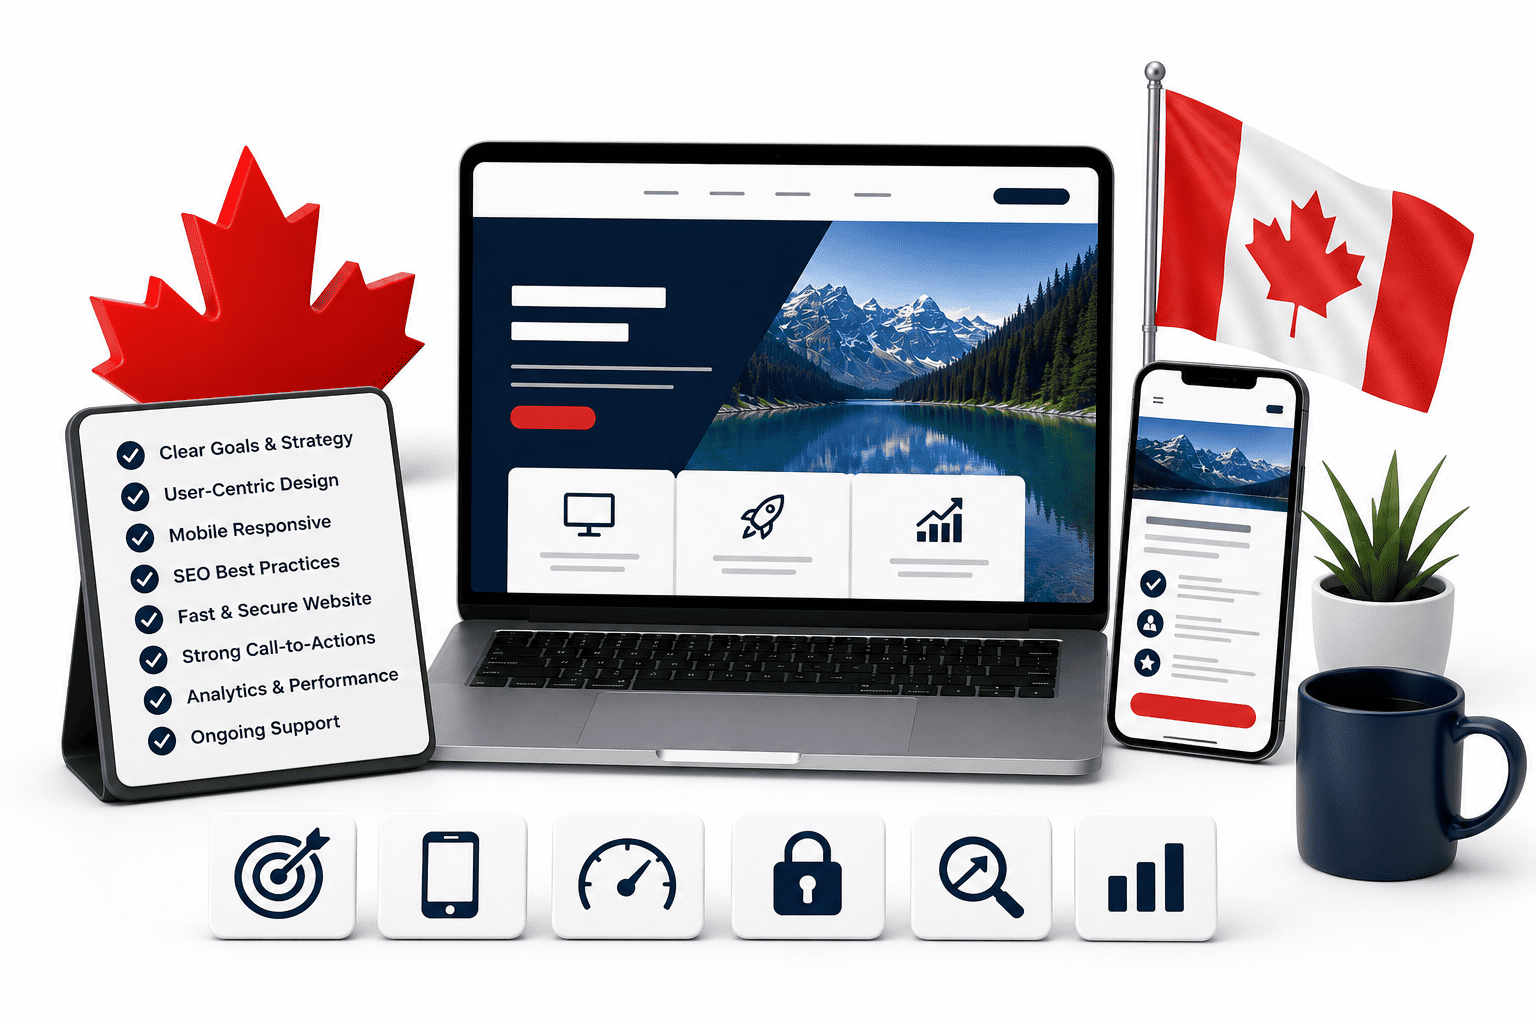
Introduction: Why Canadian Businesses Need a Localized Web Design Strategy
Off-the-shelf <a href=”https://niagaraforge.ca/service/web-design/”>web design—templates built for generic audiences in generic markets—consistently underperforms for Canadian businesses. The reasons are structural, not cosmetic. Canada is not a single market but a federation of distinct regional, linguistic, and cultural audiences. A website that works for a Toronto-based financial services firm will likely fail for a Montreal-based legal practice or a Vancouver e-commerce retailer. The gap is not about aesthetics; it is about relevance, trust, and conversion mechanics.
When you choose a web design company without local insight, you inherit assumptions that do not hold in Canada. Bilingualism is the most obvious example, but it is only the surface. Consumer behaviour in Alberta differs from Quebec, and Atlantic Canada has its own digital expectations. Trust signals—accreditations, payment methods, shipping options, even the phrasing of a privacy policy—vary by province and territory. A localized web design strategy addresses these variables deliberately, not incidentally. It ensures your site speaks the right language, in the right tone, to the right regional audience, while meeting Canadian legal and cultural standards.
The direct impact is measurable. Lead generation improves when calls-to-action align with local purchasing habits. Brand credibility increases when your site acknowledges Canadian spelling, measurement systems, and regulatory frameworks. Customer retention strengthens when the user experience feels native, not imported. This guide is structured to help you evaluate and collaborate with a web design partner who understands these nuances—and to avoid the costly pitfalls of generic outsourcing.
The Canadian Digital Landscape: Key Stats and Trends
To appreciate why localization matters, consider the digital environment Canadian businesses operate in. The following table summarizes essential context for web design decisions:
| Factor | Relevance to Web Design |
|---|---|
| Bilingual user base (English/French) | Requires language toggles, proper typography for accent characters, and content that avoids machine-translation errors. |
| Regional internet penetration differences | Urban centres have high-speed access; rural and northern areas may rely on slower connections, demanding lightweight design. |
| Mobile-first browsing share | Over half of Canadian web traffic is mobile; responsive design is non-negotiable. |
| Privacy and anti-spam legislation (PIPEDA, CASL) | Mandates clear consent mechanisms, cookie disclosures, and accessible privacy policies—non-negotiable for legal compliance. |
| Provincial consumer protection laws | Affects e-commerce return policies, pricing transparency, and warranty displays. |
| Local payment and shipping preferences | Interac e-Transfer, Canada Post rates, and provincial sales taxes (PST/GST/HST) must be integrated seamlessly. |
Trends also show that Canadian users expect faster load times (under three seconds) and accessible design (WCAG 2.1 AA compliance is increasingly a procurement standard). Ignoring these stats means your site will underperform against domestic competitors who have localized their approach.
Common Pitfalls When Outsourcing Web Design Without Local Insight
Outsourcing to a non-Canadian agency or using a global template platform introduces predictable failures. Here are the most frequent pitfalls, each with a concrete consequence:
- Language errors beyond translation: French content that uses European phrasing instead of Quebecois expressions, or English content that misses Canadian spelling (e.g., “colour” vs. “color”). Consequence: perceived as foreign, reducing trust.
- Ignoring regional holidays and seasonal peaks: A site that promotes U.S. Thanksgiving or Black Friday timing misses Canadian Thanksgiving and Boxing Day. Consequence: wasted marketing spend and missed conversions.
- Incorrect tax and legal displays: Showing a single sales tax rate when HST, GST, and PST vary by province. Consequence: legal risk and cart abandonment.
- Slow delivery for remote areas: Heavy images and scripts that ignore bandwidth constraints in northern communities. Consequence: high bounce rates among rural customers.
- No bilingual route for Quebec users: A French toggle that only translates navigation, not legal pages or product descriptions. Consequence: lost credibility and potential regulatory complaints under Quebec’s Charter of the French Language.
These pitfalls are not hypothetical. They are recurring complaints from Canadian business owners who discover, after launch, that their website actively repels the very customers they sought to attract.
How This Guide Helps You Evaluate and Collaborate with a Web Design Partner
This guide does not offer generic advice. It provides a framework for vetting web design companies against Canadian-specific criteria. You will learn to ask the right questions during discovery calls, such as: “How do you handle bilingual content routing?” or “What is your process for provincial tax integration?” You will also learn how to audit a potential partner’s portfolio for Canadian case studies, not just international work.
Beyond evaluation, the guide covers collaboration best practices. You will understand how to brief a designer on regional nuances, how to review wireframes for cultural sensitivity, and how to test a prototype with actual Canadian users. The goal is not to make you a web design expert, but to make you an informed client who can steer a project toward outcomes that matter: higher lead quality, stronger brand trust, and repeat customers across provinces. By the end, you will be equipped to turn a web design project into a strategic investment, not a cost centre.
1. Prioritize Mobile-First, Responsive Design for Multi-Device Users
Canadian web traffic has shifted decisively toward mobile devices, particularly in urban centers like Toronto, Vancouver, and Montreal, where commuters rely on smartphones for browsing during transit. A mobile-first approach—designing for the smallest screen before scaling up—ensures your website meets the expectations of these users. This practice is not merely a trend; it aligns with how Google evaluates and ranks websites, and it directly impacts user retention and conversion rates across Canada’s diverse connectivity landscape.
Why Mobile-First Indexing Matters for Google Rankings in Canada
Google has used mobile-first indexing as its primary method for crawling and ranking websites since 2021. This means Googlebot predominantly uses the mobile version of your content to determine search rankings, even for desktop queries. For Canadian businesses, this is critical because local search behavior is heavily mobile-driven—users searching for “coffee shop near me” or “plumber in Calgary” are typically on phones. If your desktop site loads faster or contains more content than your mobile version, you risk lower rankings. To comply, ensure your mobile site includes the same textual content, structured data, and internal links as your desktop version. Avoid lazy-loading critical content that requires user interaction, as Google may not render it. A practical check: use Google Search Console’s URL Inspection tool to view how Google renders your mobile pages. If you notice missing images or text, fix the underlying HTML or CSS.
Designing for 4G/5G and Rural Connectivity Variations
Canada’s vast geography creates a stark divide in internet speeds. Urban areas enjoy robust 4G and growing 5G networks, but rural and remote communities often rely on slower connections or satellite internet. A mobile-first design must account for this variability. Start by minimizing page weight—compress images using modern formats like WebP, and prioritize above-the-fold content for immediate loading. Implement responsive breakpoints that adapt to low-bandwidth conditions; for example, you can serve smaller images to devices with slower connections using the srcset attribute in HTML. Below is a practical example of how to implement this:
<img src="hero-800.jpg"
     srcset="hero-400.jpg 400w, hero-800.jpg 800w, hero-1200.jpg 1200w"
     sizes="(max-width: 600px) 400px, (max-width: 900px) 800px, 1200px"
     alt="Canadian business hero image">
Additionally, avoid heavy JavaScript frameworks that delay rendering on 3G connections. Use CSS media queries to adjust layout, font sizes, and spacing, but also consider network conditions—for instance, disable autoplay videos on mobile to save data. Test your site using Chrome DevTools’ network throttling to simulate 4G and slower 3G speeds, ensuring core functionality remains usable.
Testing Across Devices: iOS, Android, and Popular Canadian Screen Sizes
Canadian users are split between iOS and Android, though iPhone ownership is slightly higher in urban areas. To ensure a seamless experience, test your website on a variety of devices and screen sizes. Common Canadian screen dimensions include:
| Device Category | Screen Width (CSS px) | Example Devices |
|---|---|---|
| Small phones | 320–375 | iPhone SE, older Android models |
| Standard phones | 390–430 | iPhone 14/15, Google Pixel 7 |
| Large phones/tablets | 600–820 | iPad Mini, Samsung Galaxy Tab |
| Desktop | 1280–1920 | Common Windows laptops, iMac |
Your responsive breakpoints should target these ranges. For example, set a breakpoint at 600px for tablets, 900px for small desktops, and 1200px for wide screens. Test touch targets—buttons and links should be at least 48×48 pixels to accommodate thumbs. Use browser developer tools to emulate devices, but also perform physical testing on real hardware. For iOS, use Safari’s responsive design mode; for Android, use Chrome’s device toolbar. Pay attention to safe areas (notch and home indicator) on iPhones, and ensure your layout respects these by using env(safe-area-inset-*) in your CSS. Finally, monitor your analytics to see which devices your Canadian audience actually uses, then prioritize testing on those specific models. This iterative approach reduces bounce rates and improves user satisfaction, directly supporting your business goals.
2. Implement Bilingual and Multilingual Capabilities from Day One
For Canadian businesses, bilingual capability is not an afterthought—it is a strategic foundation. With English and French as official languages, and Quebec representing a significant portion of domestic e-commerce, a unilingual website excludes a substantial audience and undermines trust. Federal institutions and many provincial bodies require French content, but even private companies benefit from catering to both linguistic groups. The key is to build this capability into the architecture from the start, rather than retrofitting it later, which often leads to technical debt, duplicated content, and a fragmented user experience.
Choosing Between Subdirectories, Subdomains, or Separate Domains for French Content
Your URL structure signals to both users and search engines which language version to serve. The most common options are:
- Subdirectories:
example.ca/fr/andexample.ca/en/. This is the recommended approach for most Canadian businesses. It consolidates domain authority, simplifies analytics, and makes hreflang implementation straightforward. - Subdomains:
fr.example.ca. This separates language versions technically but can dilute link equity and requires additional configuration for shared sessions and cookies. - Separate domains:
example.caandexample.frorexemple.ca. This is rarely necessary unless you are targeting distinct countries with different TLDs, but for Canadian bilingualism it usually overcomplicates maintenance and increases costs.
For most Canadian businesses, subdirectories offer the best balance of SEO strength, user clarity, and technical simplicity. They allow you to maintain a single domain while clearly separating language versions.
Working with Professional Translators vs. Machine Translation
Machine translation has improved, but it remains insufficient for customer-facing content. A literal translation often misses cultural nuance, idiomatic expressions, and regional terminology—particularly in Quebec, where European French differs meaningfully. Professional translators provide transcreation: adapting your message to resonate emotionally and contextually with French-speaking Canadians, not just converting words. This is especially critical for marketing copy, calls-to-action, and legal disclaimers.
Consider this comparison:
| Factor | Professional Translators | Machine Translation |
|---|---|---|
| Accuracy | High, with cultural adaptation | Variable, often literal and awkward |
| SEO keywords | Researched and localized for French queries | Usually untranslated or poorly matched |
| Cost | Higher upfront investment | Low or free |
| Speed | Slower, requires review cycles | Instant |
| Best for | Core pages, marketing, legal, support | Internal notes, drafts, low-stakes content |
For a Canadian business, investing in professional translation for your primary pages is essential. Use machine translation only as a preliminary step, then have a human editor refine it. You must also implement hreflang tags (e.g., hreflang="fr-ca" and hreflang="en-ca") so search engines serve the correct language to users based on their browser settings and location. Without these tags, you risk duplicate content penalties and a poor user experience.
Designing for Text Expansion and Right-to-Left Scripts (if applicable)
French text is typically 20–30% longer than English. A button that says “Submit” becomes “Soumettre,” but a phrase like “Learn More” expands to “En savoir plus,” which is roughly twice as long. Your layout must accommodate this expansion without breaking design. Best practices include:
- Use flexible grid systems and fluid containers rather than fixed-width boxes.
- Allow ample whitespace in navigation menus and call-to-action buttons.
- Test your interface with French content early, not after development is complete.
Right-to-left scripts are not relevant for French, but if you expand to other Canadian languages—such as Inuktitut or Arabic for specific communities—you will need to mirror layouts and adjust text alignment. For most businesses, focusing on French text expansion is sufficient, but building with dir="ltr" and CSS logical properties makes future multilingual expansion easier. Prioritize a design system that treats language as a variable, not a fixed constraint.
3. Ensure Fast Loading Speeds with Canadian-Focused Hosting and CDN
Speed is a non-negotiable ranking factor for Google and a core expectation for users. For Canadian businesses, however, optimizing for speed involves more than generic performance tweaks. The physical distance between your server and your visitor directly impacts load time. A best practice is to host your website on Canadian servers or deploy a Content Delivery Network (CDN) with Points of Presence (PoPs) in Toronto, Vancouver, and Montreal. This approach not only reduces latency but also supports data residency requirements under Canadian privacy laws like PIPEDA, since visitor data stays within national borders.
Why Server Location Affects Latency for Canadian Visitors
Latency is the round-trip time it takes for data to travel from the user’s device to the server and back. Every 100 milliseconds of delay reduces conversion rates by up to 7%. If your server is located in the United States or Europe, a visitor in Calgary must send a request across the border and back—a distance that adds 30–80 ms of pure network latency, plus time for routing through multiple internet exchange points. Hosting in Canada eliminates cross-border hops, cutting latency to under 10 ms for most domestic users.
Consider this practical example: a visitor in Halifax accessing a site hosted in Vancouver (approximately 5,000 km apart) experiences roughly 45 ms of latency. The same visitor accessing a site hosted in Seattle (only 1,200 km away) but routed through congested U.S. backbone networks may see 60–70 ms. The difference compounds with every resource—HTML, CSS, JavaScript, images—that must be fetched. For a typical page with 50 requests, that extra 20 ms per request adds a full second to load time.
Selecting a CDN with Strong Canadian Coverage
A CDN caches your site’s static assets (images, stylesheets, scripts) at edge servers close to the user. Not all CDNs offer equal coverage in Canada. Many global providers have only one or two Canadian PoPs, often in Toronto and Montreal, leaving Western Canada underserved. When evaluating a CDN, look for these criteria:
- PoP locations: At minimum, require nodes in Toronto (East), Vancouver (West), and Montreal (Central). Ideally, also include Calgary or Edmonton.
- Data residency controls: Ensure the CDN allows you to restrict caching to Canadian servers only. Some CDNs offer “geo-fencing” or region-specific edge configurations.
- Origin pull: Your origin server should be in Canada, and the CDN should pull content from that origin without routing through foreign intermediate servers.
- HTTP/3 and QUIC support: These protocols reduce connection setup time, especially over mobile networks.
A practical configuration for a Canadian-focused CDN using a popular provider might look like this (using a CLI command for Cloudflare’s API, for example):
curl -X PATCH "https://api.cloudflare.com/client/v4/zones/{zone_id}/settings/edge_cache_ttl"
     -H "Authorization: Bearer {api_token}"
     -H "Content-Type: application/json"
     --data '{"value": 14400}'
This command sets a 4-hour edge cache TTL, ensuring static files are served from Canadian PoPs while reducing origin load.
Core Web Vitals: Metrics to Monitor and Improve
Google’s Core Web Vitals are the definitive metrics for user experience and ranking. For Canadian sites, three metrics demand particular attention:
| Metric | Good Threshold | Canadian-Specific Action |
|---|---|---|
| Largest Contentful Paint (LCP) | ≤ 2.5 seconds | Use a CDN to serve hero images from Toronto or Vancouver PoPs; preload critical assets. |
| First Input Delay (FID) / Interaction to Next Paint (INP) | ≤ 100 ms / ≤ 200 ms | Minimize JavaScript and use server-side rendering. Reduce third-party scripts that add round trips. |
| Cumulative Layout Shift (CLS) | ≤ 0.1 | Reserve space for images and ads. Use CSS aspect-ratio boxes to prevent layout jumps. |
To improve these metrics, implement three foundational optimizations:
- Image optimization: Convert images to WebP or AVIF format. Compress them to under 200 KB per image. Serve responsive sizes using
srcsetattributes. - Lazy loading: Add
loading="lazy"to all images and iframes below the fold. This defers loading until the user scrolls near them, reducing initial page weight by up to 40%. - Caching: Set browser cache headers (e.g.,
Cache-Control: max-age=31536000for static assets). Use server-side caching (Redis or Varnish) for dynamic content, but ensure cached copies are stored on Canadian servers.
Finally, use tools like Google PageSpeed Insights or WebPageTest with a testing location set to Toronto to measure real-world performance. Monitor these metrics monthly, as CDN edge configurations and third-party scripts can degrade speed over time. By prioritizing Canadian server locations and CDN coverage, you align speed optimization with privacy compliance—a dual benefit that builds trust with domestic customers and improves search rankings simultaneously.
4. Build Trust with Clear Local Signals: Reviews, Certifications, and Contact Info
Canadian consumers are notably cautious when engaging with online businesses, often conducting deeper due diligence than shoppers in less regulated markets. They look for verifiable proof that a company is legitimate, established, and accountable. For a web design company serving Canadian clients, this means moving beyond generic trust signals and embedding localized, specific evidence of reliability throughout the site. The goal is to answer the unspoken question: “Can I trust this firm with my business and my data?” A thoughtful approach to reviews, accreditations, and transparent contact details directly addresses that concern, reducing friction in the decision-making process.
Leveraging Canadian Reviews and Case Studies by Province
Generic testimonials from unnamed sources no longer carry weight. Instead, feature reviews that clearly identify the client’s industry, city, and province. This specificity creates immediate resonance with prospects in similar regions, as they can picture their own business context. When possible, structure case studies to highlight challenges unique to Canadian markets, such as bilingual content requirements in Quebec, cross-border logistics for Ontario-based e-commerce, or seasonal tourism cycles in British Columbia. A simple table on your services page can help organize this local proof:
| Province | Client Industry | Key Outcome |
|---|---|---|
| Alberta | Oilfield supply chain | Reduced bounce rate by 32% |
| Quebec | Legal services (FR/EN) | Increased bilingual lead generation |
| Nova Scotia | Seafood export | Improved mobile conversion by 18% |
Always obtain written permission to use client names and logos. Displaying a province-specific map with pins or a filterable review grid adds an interactive layer of transparency that generic sliders lack.
Displaying Professional Accreditations and Industry Memberships
Accreditations serve as third-party validation of your processes and ethics. For Canadian businesses, the most recognized symbols include Better Business Bureau (BBB) accreditation with a visible rating, membership in local chambers of commerce, and certifications from recognized web standards bodies like the World Wide Web Consortium (W3C) or the Interactive Advertising Bureau of Canada (IAB Canada). Display these badges in the footer and on the ‘About’ page, but avoid placing them in the hero section where they may appear as paid ads. Pair each badge with a one-sentence explanation of what it means. For example, next to the BBB logo, write: “Accredited since 2019 with an A+ rating, reflecting our commitment to resolving client disputes fairly.” Do not overstate security certifications. If you comply with PIPEDA (Personal Information Protection and Electronic Documents Act), state that you follow its principles, but avoid claiming “PIPEDA certified,” as no official certification exists.
Creating a Transparent ‘Contact Us’ Page with Local Phone and Hours
A hidden contact page is a major red flag. Your ‘Contact Us’ page should include a physical street address (not a P.O. box), a local phone number with the correct area code, and clearly stated business hours in your time zone. For multi-province operations, list each office location separately with its own local contact details. This granularity signals that you have a real presence, not a virtual front. Also, provide a direct email address and a response-time estimate (e.g., “We reply within one business day”). If you offer emergency support for existing clients, mention that separately with a dedicated hotline. Consider adding a simple map embed, but ensure the address text is crawlable and consistent with your footer and Google Business Profile. Finally, include a note about how you handle personal data submitted through forms, referencing your privacy policy without legal jargon. This simple, honest disclosure builds more trust than any badge.
5. Optimize for Local SEO Across Provinces and Cities
For Canadian businesses, local SEO is not a single tactic but a layered strategy that must respect the country’s geographic and linguistic diversity. A customer in Vancouver searches differently than one in Montreal or Halifax, and your web design company’s success depends on aligning your online presence with these regional search behaviours. The core principle is to make it unmistakably clear to both search engines and users where you operate, what you offer, and how to contact you—without creating thin or duplicated content that harms your rankings.
Conducting Local Keyword Research with Canadian Search Volume
Generic keywords like “web design” are too competitive and too vague for local capture. Instead, your research must focus on province- and city-level modifiers that reflect actual Canadian search patterns. Use tools like Google Keyword Planner or SEMrush, but filter results to Canadian locations—search volume for “web design” in Canada differs significantly from US data. Pay attention to regional terminology: “web design Toronto” versus “web design Vancouver” may have similar intent, but “web design Calgary” might pair with “small business” more often, while “web design Montreal” requires French-language variants like “conception de sites web Montréal.”
Build a keyword matrix that includes:
- Primary city keyword (e.g., “web design Ottawa”)
- Province-wide keyword (e.g., “web design Ontario”)
- Service-specific local keyword (e.g., “ecommerce web design Edmonton”)
- French-language equivalents for Quebec markets
Track monthly search volume, competition level, and the presence of local pack results. If your city shows high competition for the generic term, target long-tail variations like “affordable web design for restaurants in Victoria.” This approach captures users with higher purchase intent who are closer to conversion.
Building Province-Specific Location Pages That Avoid Duplicate Content
One of the most common mistakes is creating identical pages for every city with only the city name swapped. This triggers duplicate content penalties and provides no value to users. Each province-specific page must offer unique, substantive information. For example, a page for “Web Design in British Columbia” could discuss local industry clusters (tech in Vancouver, tourism in Victoria), local business regulations, or case studies from regional clients. A page for “Web Design in Alberta” might focus on oil and gas sector needs or Calgary’s startup ecosystem.
Structure each page with:
- Original introduction explaining why local presence matters
- Unique services tailored to that region’s industries
- Local testimonials or project examples (with permission)
- Embedded Google Map with your service area highlighted
- Local contact details or a dedicated phone number if possible
Additionally, ensure your robots.txt file does not block these pages, and use rel="canonical" correctly on any similar service pages to point to the most authoritative version. Here is a practical example of a canonical tag for a province-specific page:
<link rel="canonical" href="https://www.yourdomain.com/web-design-british-columbia" />This tells search engines which URL is the primary version, preventing duplicate content issues across similar city pages.
Managing Online Directories: Yellow Pages, Yelp, and Industry-Specific Sites
Consistent NAP (Name, Address, Phone) across all directories is non-negotiable. Inconsistent listings—such as “St. John’s” versus “Saint John’s” or a missing suite number—confuse search engines and erode trust. For Canada, prioritize these directories:
| Directory | Importance for Canada | Action Required |
|---|---|---|
| Google Business Profile | Critical for local pack and map results | Claim, verify, update hours, add photos, post weekly updates |
| Yellow Pages (yellowpages.ca) | High authority for Canadian searches | Claim listing, ensure NAP matches your website footer |
| Yelp | Used by mobile users for reviews | Monitor reviews, respond promptly, add service area |
| Industry-specific (e.g., Clutch for agencies) | Builds niche authority | Complete profile with portfolio and client testimonials |
For Google Business Profile specifically, optimize each location you serve. If you have physical offices in multiple provinces, create separate profiles for each. Use the “products and services” section to list province-specific offerings. Regularly post updates about local events or projects. Most importantly, ensure your website footer displays your NAP exactly as it appears in your primary directory listings—this consistency is a strong local ranking signal. Set a quarterly reminder to audit all directories for accuracy, especially after any address or phone number change.
6. Design for Accessibility and Inclusive User Experience
For Canadian businesses, accessibility is not an afterthought—it is a legal and practical foundation of responsible web design. Ontario’s Accessibility for Ontarians with Disabilities Act (AODA) mandates compliance for public and private organizations, and other provinces, including Manitoba and Nova Scotia, have similar legislation. Beyond legal obligations, designing for accessibility directly improves your SEO, as search engines favour clear structure and semantic HTML, and it expands your reach to the 22% of Canadians who live with a disability. The benchmark for best practice is the Web Content Accessibility Guidelines (WCAG) 2.1, Level AA. Adopting these standards from the start of a project reduces retrofitting costs and creates a site that works for everyone—on any device, in any context.
Understanding AODA and WCAG Requirements for Public Websites
AODA’s Integrated Accessibility Standards Regulation (IASR) requires public websites and web content published after January 1, 2012, to conform to WCAG 2.0 Level AA. However, the current best practice is to adopt WCAG 2.1 Level AA, which adds criteria for mobile devices, cognitive accessibility, and low-vision users. Key requirements you must understand:
- Perceivable: Provide text alternatives for non-text content, captions for videos, and sufficient colour contrast (4.5:1 for normal text, 3:1 for large text).
- Operable: Ensure all functionality is available via keyboard, no keyboard traps, and users have enough time to read and interact with content.
- Understandable: Make page titles descriptive, link text meaningful (avoid “click here”), and form inputs have clear labels and instructions.
- Robust: Use valid HTML and ARIA roles so assistive technologies (screen readers, magnifiers) can parse the content reliably.
Note that AODA applies to both public and private organizations with 50 or more employees in Ontario, but smaller businesses should still follow WCAG to avoid risk and reach more customers.
Practical Steps: Alt Text, Form Labels, and Focus States
Three concrete areas yield high impact for accessibility and are easy to implement correctly:
- Alt text: Write descriptive, concise alt text for meaningful images (e.g., “Chart showing quarterly sales growth from Q1 to Q4”). For decorative images, use empty alt text (
alt="") so screen readers skip them. Never stuff keywords; context matters more than exact match. - Form labels: Every input field must have a programmatically associated
<label>element, not just placeholder text. Placeholders disappear and often lack sufficient contrast. Include instructions for required fields (e.g., “Required”) and provide error messages that identify the field and suggest a fix. - Focus states: Ensure a visible focus indicator (e.g., a 2-pixel outline or background colour change) for all interactive elements—links, buttons, and form fields. Don’t remove the default
:focusoutline without replacing it with a custom style. Keyboard users rely on this to navigate.
Additionally, use semantic HTML (proper heading hierarchy, <nav>, <main>, <button> instead of <div> with click handlers) to reduce reliance on ARIA and improve SEO.
Testing with Users Who Have Disabilities: Tools and Methods
Automated tools catch only 30–50% of accessibility issues, so manual testing and real-user feedback are essential. A practical approach combines multiple methods:
| Method | Tools/Examples | What It Catches |
|---|---|---|
| Automated scanning | axe DevTools, WAVE, Lighthouse | Missing alt text, low contrast, duplicate IDs, empty links |
| Keyboard-only navigation | Tab key, Shift+Tab, Enter, Space | Focus traps, non-operable widgets, missing skip links |
| Screen reader testing | NVDA (Windows), VoiceOver (macOS/iOS) | Unlabeled buttons, poor heading structure, ambiguous link text |
| User testing | Recruit participants with disabilities (e.g., via local advocacy groups) | Real-world barriers, cognitive overload, unexpected behaviours |
Run these tests during development, not just at the end. For user testing, offer multiple formats (in-person, remote, or recorded) and compensate participants. Combine findings with a manual review of WCAG 2.1 AA checkpoints. Document issues in a tracking system and prioritize fixes based on severity and user impact. Regular testing—quarterly or after major content updates—keeps your site compliant and genuinely inclusive.
7. Integrate E-Commerce Best Practices for Canadian Payment and Shipping
For Canadian businesses selling online, the checkout experience is where customer trust is either solidified or broken. A generic, US-centric payment flow can lead to abandoned carts and lost revenue. To compete effectively, your web design company must build an e-commerce experience that speaks directly to Canadian payment habits, tax structures, and shipping realities. This means going beyond simply adding a “CAD” option and instead tailoring every step from cart to confirmation.
Choosing Payment Gateways That Support CAD and Canadian Banks
Not all payment processors are created equal when it comes to Canadian commerce. Your chosen gateway must handle Canadian Dollar (CAD) settlements and integrate seamlessly with major Canadian financial institutions. Look for gateways that offer direct debit from Canadian bank accounts (often via Interac Online or direct integration with major banks like RBC, TD, Scotiabank, BMO, and CIBC). Additionally, ensure the gateway supports Interac e-Transfer as a payment method, which is uniquely popular in Canada for its security and lack of chargebacks. While credit cards (Visa, Mastercard, Amex) remain dominant, offering Interac e-Transfer as an alternative can significantly boost conversion among privacy-conscious consumers. Avoid gateways that force currency conversion through US-based processors, as this adds hidden fees and confuses pricing.
Calculating Taxes (GST/HST/PST) and Shipping Rates Automatically
Canada’s tax system is complex, with GST (Goods and Services Tax), HST (Harmonized Sales Tax) in certain provinces, and PST (Provincial Sales Tax) in others. Manual tax calculation is prone to errors and legal non-compliance. Your website must automatically apply the correct tax rate based on the customer’s shipping province. For example, a customer in Alberta pays 5% GST, while a customer in Ontario pays 13% HST, and a customer in British Columbia pays 5% GST plus 7% PST. Similarly, shipping rates must be calculated in real-time using Canadian carriers (Canada Post, Purolator, UPS, FedEx) with accurate dimensional weight and delivery zones. For cross-border purchases from the US, your site must clearly display estimated duties and brokerage fees at checkout, not after payment, to avoid surprise charges that lead to abandoned orders.
Designing a Checkout Flow That Reduces Cart Abandonment
Canadian shoppers expect a frictionless, transparent checkout. First, offer a guest checkout option—do not force account creation. Second, display all costs upfront: product price, taxes, shipping, and any duties, before the customer enters payment details. Third, keep the checkout page free of distractions like navigation menus or promotional pop-ups. Fourth, provide multiple payment options on the same screen, including credit cards, Interac e-Transfer, and digital wallets like Apple Pay or Google Pay, which are widely used in Canada. Finally, include a progress indicator (e.g., “Step 1 of 3”) and a clear order summary with a “Edit” button for cart items. A well-designed checkout flow reduces cognitive load and builds confidence, directly lowering cart abandonment rates.
| Feature | Basic Checkout (US-Centric) | Canadian-Optimized Checkout |
|---|---|---|
| Currency Display | USD only, no local option | CAD default, with clear USD toggle |
| Tax Calculation | Flat rate or single tax | Automatic GST/HST/PST by province |
| Payment Methods | Credit cards only | Credit cards + Interac e-Transfer + digital wallets |
| Shipping & Duties | Flat shipping, no duties shown | Real-time Canada Post rates, duties prepaid for cross-border |
| Address Validation | US ZIP codes only | Canadian postal codes with auto-format (e.g., K1A 0B1) |
By integrating these e-commerce best practices into your web design, you create a checkout experience that feels native to Canadian users. This reduces friction, builds trust, and ultimately increases conversion rates for your online store.
8. Leverage Analytics and Privacy-Compliant Tracking to Improve Performance
For Canadian businesses, the line between actionable data and user privacy is not just a technical concern—it is a legal obligation. The Personal Information Protection and Electronic Documents Act (PIPEDA), along with provincial laws such as Quebec’s Law 25, mandates that you obtain meaningful consent before collecting or using personal data through tracking technologies. Ignoring these rules can lead to fines, reputational damage, and loss of customer trust. The best practice is not to avoid analytics altogether, but to adopt a privacy-first approach: use tools designed for minimal data collection, configure a robust consent management platform (CMP), and let the insights you gather drive design improvements—all while keeping user rights at the core of your strategy.
Setting Up Consent Management for Cookies and Trackers
A consent management platform is your first line of defense. It must do more than display a banner; it should actively block all non-essential trackers before the user makes a choice. Configure your CMP to distinguish between strictly necessary cookies (e.g., session identifiers for login) and optional ones (e.g., marketing pixels, analytics). For Canadian compliance, follow these steps:
- Granularity: Offer separate toggles for analytics, advertising, and personalization, rather than a single “accept all” button.
- Withdrawal ease: Ensure users can change their preferences at any time via a visible “Cookie Settings” link in the footer.
- Proof of consent: Store a timestamped record of each user’s choice, including the specific version of your privacy policy they agreed to.
Here is a minimal JavaScript example that checks consent before loading a non-essential analytics script:
function loadAnalytics() {
  if (window.consentStatus && window.consentStatus.analytics === true) {
    var s = document.createElement('script');
    s.src = 'https://analytics.example.com/tracker.js';
    document.head.appendChild(s);
  }
}
window.addEventListener('DOMContentLoaded', loadAnalytics);
Choosing Analytics Tools That Offer Data Residency in Canada
Data residency is a critical factor for Canadian businesses. When your analytics provider stores data on servers outside Canada, it may be subject to foreign law enforcement access, which can conflict with PIPEDA’s accountability principle. To mitigate this, evaluate tools that offer Canadian data centers or regional hosting. Popular privacy-friendly options include:
| Tool | Data Residency | Key Privacy Feature |
|---|---|---|
| Plausible | EU (can be configured for Canadian hosting via partners) | No cookies, fully anonymized IPs |
| Matomo (self-hosted) | Your own Canadian server | Full control over data, no third-party sharing |
| Fathom Analytics | Canada (Toronto region available) | EU/UK and Canadian data residency options |
| Adobe Analytics | Canada (Toronto) | Enterprise-grade consent integration |
Before committing, ask each vendor for a written data processing agreement that specifies the storage location, sub-processors, and breach notification procedures. If a tool lacks Canadian residency, consider self-hosting an open-source solution on a cloud provider with a Canadian region, such as AWS Canada (Central) or Azure Canada Central.
Using Heatmaps and Session Recordings to Identify UX Friction
Heatmaps and session recordings reveal where users click, scroll, and hesitate—insights that are invaluable for redesigning layouts, forms, and calls to action. However, these tools are among the most privacy-invasive because they capture mouse movements and page content. To use them ethically and legally in Canada:
- Mask sensitive fields: Automatically blur or exclude text inputs for payment details, health information, or personal identifiers.
- Limit recording time: Store recordings for a maximum of 30 days, then purge them.
- Anonymize IPs: Truncate the last octet of IP addresses before any processing.
When analyzing the data, focus on patterns rather than individual sessions. For example, if 40% of users abandon a checkout form at the “Province” dropdown, that is a clear signal to simplify the input—perhaps by using a text field with autocomplete. Similarly, if heatmaps show users clicking on non-interactive elements, such as a heading or image, consider making those elements clickable or adding visual affordances. Always pair these tools with your CMP: if a user denies consent for analytics, the heatmap script must not load at all. By respecting this boundary, you build a feedback loop that improves UX without compromising the privacy that Canadian users expect.
9. Plan for Scalability and Future-Proofing with a Modular Design System
Canadian businesses operate in a landscape defined by rapid growth, shifting consumer preferences, and regional regulatory nuances. A website built as a monolithic structure quickly becomes a liability when you need to launch a new service, enter a new province, or integrate with local financial tools. The best practice is to adopt a modular design system—a library of reusable, self-contained components governed by clear standards. This approach not only accelerates development but also ensures consistency across every page, campaign, and future feature. When paired with a flexible content management system (CMS) and a documented maintenance strategy, your website becomes a strategic asset that adapts to market changes rather than a bottleneck that slows you down.
Creating a Design Token System for Consistent Branding
Design tokens are the foundational variables—colors, typography, spacing, border radii, and shadows—that define your visual identity. For Canadian businesses operating across multiple provinces or language markets, tokens ensure that your brand remains cohesive even as content varies. Instead of hard-coding a hex code for “maple red” in every component, you define a token like --color-primary: #D80621 once. When you update that token, every button, link, and banner updates automatically. This system also simplifies compliance with accessibility standards (e.g., WCAG 2.1 AA) by centralizing contrast ratios and focus states. For example, tokens for interactive elements can enforce a minimum 4.5:1 contrast ratio, reducing the risk of inaccessible design. When onboarding a new agency or developer, tokens serve as the single source of truth, eliminating guesswork and version drift. Start with a small set of core tokens (brand, neutral, semantic, and typography scales), then extend them as your design evolves.
Selecting a CMS That Supports Multilingual and Multi-Region Content
Canada’s bilingual reality—English and French at the federal level, plus growing demand for other languages—makes CMS selection a critical scalability decision. A modular design system is only effective if your CMS can deliver content variations without duplicating components. Look for a headless or hybrid CMS with built-in localization features: content versioning per locale, URL slug handling (e.g., /fr/ for French), and the ability to manage region-specific offers, pricing, or legal disclaimers (e.g., Quebec’s Bill 101 requirements). For multi-region needs, the CMS should support geo-targeting or audience-based content rules, so a visitor in British Columbia sees a different call-to-action than one in Nova Scotia. Additionally, ensure the CMS integrates with Canadian-specific tools like QuickBooks Canada, HST/GST calculators, or shipping APIs for providers like Canada Post. A modular CMS architecture allows you to swap or add these integrations without rewriting your front-end code. Test your CMS’s API rate limits and content scheduling features—these become vital when you need to coordinate a national campaign across time zones.
Establishing a Maintenance and Update Roadmap with Your Web Design Partner
A modular design system is not a one-time deliverable; it requires continuous governance. Best practice is to formalize a maintenance roadmap with your web design partner that covers three horizons: immediate fixes (security patches, broken links), quarterly enhancements (new components, performance tuning), and annual audits (accessibility reviews, tech stack upgrades). Your partner should document every component’s usage, dependencies, and deprecation schedule. For example, if a third-party API changes its authentication method, your roadmap should include a plan to update the affected module. Also, schedule regular content refreshes that align with Canadian business cycles—tax season (April), back-to-school (September), and holiday shopping (November). A clear roadmap prevents reactive, costly emergency fixes and ensures your design system evolves with your brand. Insist on a shared documentation portal (e.g., a wiki or Storybook instance) where both your team and the agency can track version history, decision logs, and upcoming changes. This transparency reduces miscommunication and keeps your website resilient as your business scales.
Frequently Asked Questions
Why is bilingual web design important for Canadian businesses?
Canada has two official languages, English and French. To serve all Canadians effectively, your website should be available in both languages, especially if you operate nationally or in Quebec. Bilingual design improves user experience, builds trust, and expands your market reach. It also demonstrates respect for Canadian linguistic diversity, which can enhance your brand reputation. Implementing proper language tags (hreflang) and ensuring accurate translations are key to SEO and usability.
What web accessibility standards should Canadian businesses follow?
Canadian businesses should aim to meet WCAG 2.1 AA standards, which are referenced in the Accessibility for Ontarians with Disabilities Act (AODA) and other provincial regulations. This includes providing text alternatives for images, ensuring keyboard navigation, sufficient color contrast, and clear headings. Accessibility not only helps people with disabilities but also improves overall user experience and can positively impact SEO. Following these standards is a legal requirement in some provinces, so compliance is essential.
How can local SEO benefit a Canadian web design company?
Local SEO helps your website rank for searches with geographic modifiers like ‘web design Toronto’ or ‘web design Vancouver.’ By optimizing your site with local keywords, creating location-specific pages, and maintaining consistent NAP (Name, Address, Phone) citations, you attract nearby clients. Since many Canadian businesses seek local web design services, local SEO can significantly increase qualified leads. It also builds trust as users often prefer businesses they can visit or contact in their time zone.
What are the best practices for multilingual SEO in Canada?
Use hreflang tags to tell search engines which language and regional URL a page is intended for, such as ‘en-ca’ and ‘fr-ca.’ Ensure each language version has unique, high-quality content, not just machine-translated text. Structure URLs logically, like example.com/en/ and example.com/fr/. Also, consider Canadian spelling variations (e.g., ‘colour’ vs. ‘color’) and local search terms. Consistent metadata in each language is crucial for proper indexing.
How does website speed affect Canadian users?
Canadian users expect fast-loading pages; even a one-second delay can reduce conversions. With Canada’s vast geography, users in remote areas may have slower internet connections, so optimizing for speed is even more critical. Compress images, leverage browser caching, and use a content delivery network (CDN) with servers in Canada to reduce latency. Faster sites also rank better in search engines, improving your overall online visibility.
What are the essential pages for a Canadian business website?
At minimum, include a Home page, About Us, Services/Products, Contact, and a Privacy Policy. For Canadian businesses, consider adding a page in French and English, a page explaining your service areas (e.g., ‘Serving Toronto and the GTA’), and testimonials from Canadian clients. If you serve multiple provinces, create location-specific landing pages. Also, include a clear call-to-action and a secure contact form to capture leads.
Why is mobile-first design important for Canadian websites?
A large majority of Canadian internet users browse on mobile devices. Google uses mobile-first indexing, meaning it primarily uses the mobile version of your site for ranking. A responsive, mobile-first design ensures your site looks and functions well on all screen sizes, improving user experience and SEO. It also reduces bounce rates, as users are more likely to stay on a site that is easy to navigate on their phone.
How can Canadian businesses ensure their website complies with PIPEDA?
PIPEDA (Personal Information Protection and Electronic Documents Act) governs how private-sector organizations collect, use, and disclose personal information. To comply, your website must have a clear privacy policy, obtain consent for data collection, and provide users with access to their information. Use secure forms (HTTPS), and limit data collection to what is necessary. For businesses in Quebec, also consider the new Law 25 requirements. Compliance builds trust and avoids legal penalties.
Sources and further reading
- WCAG 2.1 Standard – W3C
- PIPEDA in Brief – Office of the Privacy Commissioner of Canada
- Google Search Central – Mobile-First Indexing
- Google PageSpeed Insights – Documentation
- Statistics Canada – Internet Use by Canadians
- Web Content Accessibility Guidelines (WCAG) Overview – W3C
- Innovation, Science and Economic Development Canada – Digital Charter
- Canadian Human Rights Commission – Accessibility
- Moz – Beginner’s Guide to SEO
- Nielsen Norman Group – Web Usability Guidelines
Need help with this topic?
Send us your details and we will contact you.







Comments (2)
Pingback: Custom Web Design for Small Businesses in Canada: Guide
Pingback: WordPress Web Design in Canada: Business Guide 2026