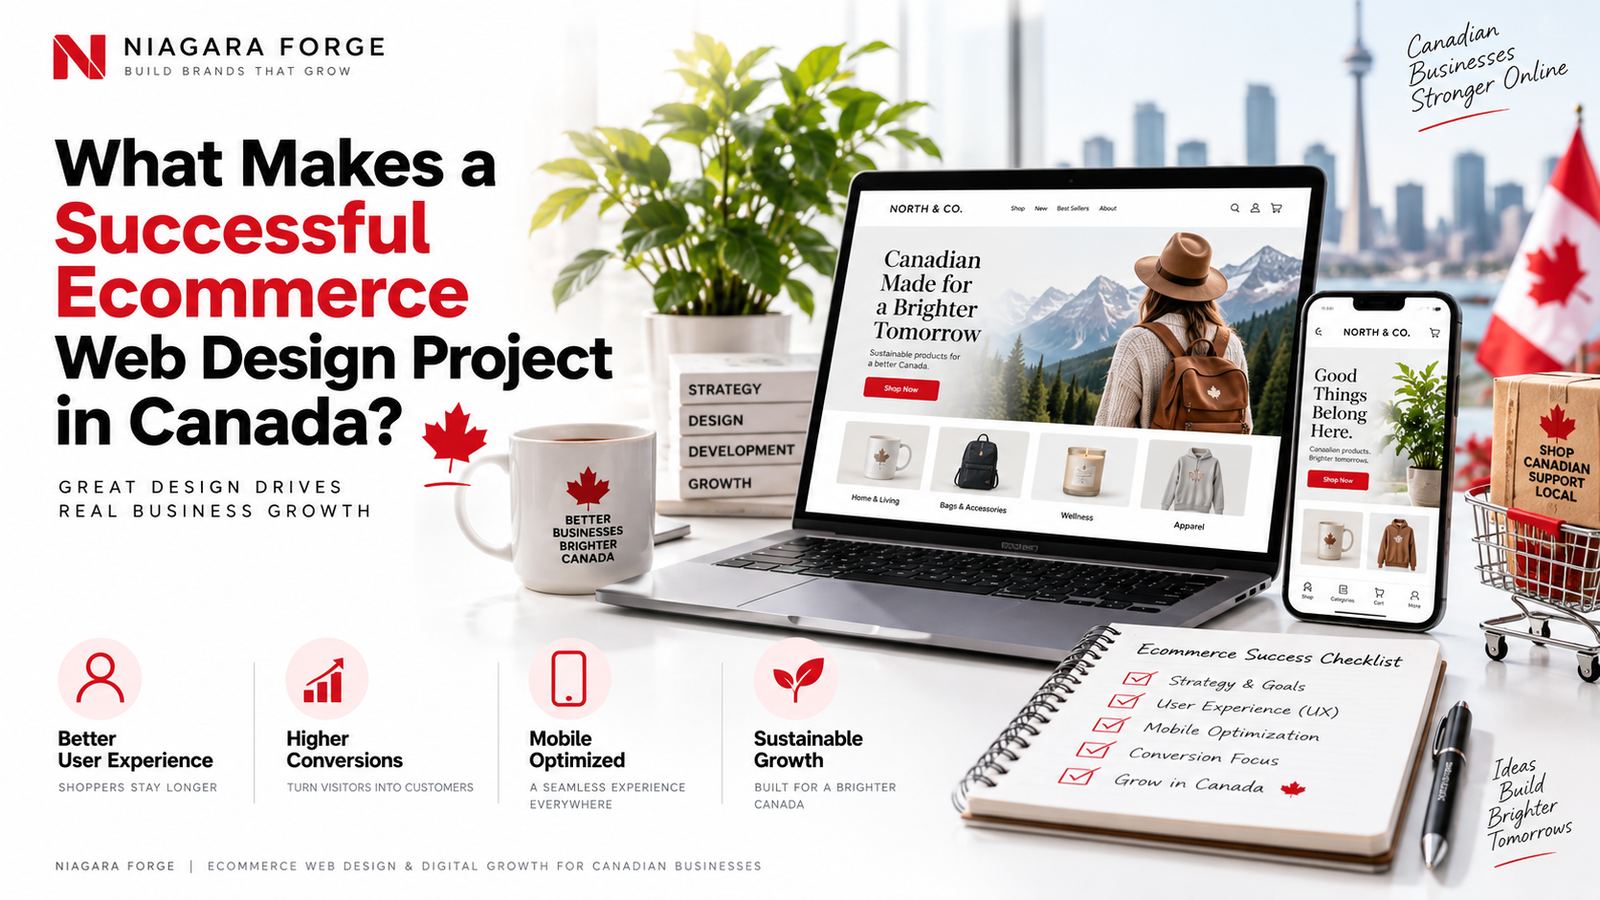
Introduction: Why Vancouver Businesses Need a Strategic Ecommerce Website
Vancouver’s retail landscape has shifted decisively toward digital. With a dense urban population, high smartphone penetration, and a strong culture of supporting local brands, the city offers a fertile ground for online commerce. However, that same opportunity attracts significant competition—from established national retailers to agile DTC startups. A generic, template-driven storefront will not suffice. To capture attention and convert visitors into loyal customers, Vancouver businesses must treat their ecommerce website as a strategic asset, not just a digital brochure.
The Rise of Online Shopping in Vancouver
Consumer behaviour in Metro Vancouver has evolved rapidly over the past five years. While foot traffic in malls like Pacific Centre and Metrotown remains steady, a growing share of purchasing decisions begins online—even for items traditionally bought in-store. Groceries, home goods, apparel, and specialty foods are now routinely ordered through ecommerce platforms. Several factors drive this trend:
- Dense, tech-savvy demographics: Vancouver has one of the highest rates of internet and mobile usage in Canada, with residents comfortable navigating digital storefronts.
- Traffic and transit constraints: Crossing the city or commuting from the suburbs can be time-consuming, making home delivery increasingly attractive.
- Post-pandemic habits: The shift toward online ordering during 2020–2022 created lasting routines, particularly among professionals and families.
- Local delivery expectations: Vancouverites expect fast, reliable shipping—same-day or next-day for many items—which pushes businesses to build robust backend logistics alongside their websites.
For local merchants, this means that an ecommerce site is no longer optional. It is the primary storefront for a significant segment of customers who may never walk through a physical door.
How a Well-Designed Ecommerce Site Drives Local and Global Sales
A strategic ecommerce design does more than display products. It actively removes friction from the buyer’s journey, builds trust, and opens channels beyond the city limits. Locally, a well-structured site can integrate with Vancouver-specific logistics—such as local pickup zones, neighbourhood delivery windows, or partnerships with regional couriers. It can also highlight Canadian pricing in CAD, include GST/PST calculations, and offer payment options like Interac Online that feel familiar to local shoppers.
Globally, the same site can serve as an export engine. Vancouver businesses—from craft coffee roasters to outdoor gear manufacturers—have a built-in reputation for quality and sustainability. A site with clear international shipping policies, multi-currency support, and responsive design can attract buyers in the U.S., Asia, and Europe. The key is architecture: clean product categories, detailed descriptions, high-resolution imagery, and a checkout process that does not require a user to create an account before purchasing. These elements reduce cart abandonment, which is the single most significant revenue leak for underperforming stores.
Moreover, a strategic design supports <a href=”https://niagaraforge.ca/service/search-engine-optimization/”>search engine optimization (SEO) tailored to both local queries (“buy organic skincare in Vancouver”) and broader product searches. This dual focus allows a single website to serve two distinct audiences without confusing either.
What This Guide Covers: Strategy, Costs, and the Design Process
This guide is structured to give Vancouver business owners a realistic roadmap before they invest in a new or redesigned ecommerce platform. The following sections break down the three pillars of a successful project:
- Strategy: How to define your target customer, choose the right platform (Shopify, WooCommerce, or custom), and map user flows that mirror how Vancouverites actually shop.
- Cost: A transparent look at typical price ranges for design, development, copywriting, photography, and ongoing maintenance—so you can budget without hidden surprises.
- Process: What to expect from discovery through launch, including timelines, content requirements, and how to collaborate with a design team for the best outcome.
By the end, you will have a clear understanding of what separates a high-converting ecommerce site from a costly digital placeholder. Whether you are launching a new brand or migrating an existing store, the decisions outlined here will help you avoid common pitfalls and build a platform that grows with your business.
Understanding Ecommerce Web Design: More Than Just Looks
When a local boutique or a growing B2B supplier in Vancouver talks about “ecommerce web design,” they often picture a pretty homepage with product photos. But a true ecommerce build is a conversion machine, not a digital brochure. Unlike a static business site that simply presents information, an online store must handle complex transactions, inventory logic, secure payments, and customer account management—all while guiding visitors toward a purchase. The visual layer matters, but it only succeeds when it supports three pillars: seamless functionality, intuitive user experience, and deliberate conversion psychology. A brochure site can afford to be artistic; an ecommerce site must be strategic.
Key Components of a High-Performing Ecommerce Site
Under the hood, a high-performing store relies on several non-negotiable elements that work together. Each component directly affects whether a visitor completes checkout or abandons their cart.
- Product architecture: Clean, filterable categories and search that returns relevant results in under one second.
- Secure and fast checkout: SSL certificates, PCI-compliant payment gateways, and a checkout flow with minimal form fields.
- Inventory and order synchronization: Real-time stock updates to prevent overselling, plus automated order confirmations.
- Responsive mobile framework: Over 60% of Vancouver shoppers browse on phones; the design must adapt without losing speed.
- Scalable hosting setup: A content delivery network (CDN) and caching layer to handle traffic spikes during sales events.
For example, a common technical pitfall is slow product image loading. A practical fix in your theme’s functions file (if using WordPress/WooCommerce) is to enable lazy loading:
add_filter('wp_get_attachment_image_attributes', function($attr) {
    $attr['loading'] = 'lazy';
    return $attr;
});
This simple code snippet tells the browser to load images only when they scroll into view, cutting initial page weight by up to 30%—a direct boost to both user experience and search rankings.
The Role of User Experience (UX) in Online Retail
User experience in ecommerce is not about pretty transitions; it is about reducing friction at every step. For a Vancouver shopper, that means a store that loads quickly, displays clear shipping costs for local delivery, and remembers their cart across devices. UX design decisions like sticky “Add to Cart” buttons, progress indicators during checkout, and predictive search bars all answer one question: “How easy is it for me to buy this?” A well-designed UX also anticipates errors—such as showing a gentle inline warning when a postal code is mistyped, rather than clearing the entire form. When UX fails, even a stunning design leads to frustration. For instance, if a customer must create an account before purchasing, you lose roughly 25% of potential sales. Opting for a guest checkout option is a UX decision that directly protects revenue.
Conversion Rate Optimization (CRO) as a Design Principle
CRO is the practice of turning passive visitors into paying customers, and it must be baked into the design from the first wireframe, not added later as an afterthought. Every color, button placement, and product description has a job: to persuade. Key CRO tactics in ecommerce design include:
- Social proof placement: Displaying review stars and “X people bought this today” directly under the product title, not at the bottom of the page.
- Urgency cues: Subtle countdown timers for limited stock or free shipping thresholds, but used sparingly to avoid looking gimmicky.
- Contrast-driven calls to action: The “Add to Cart” button should be the most visually dominant element on the page, using a color that stands out from your brand palette.
- Trust badges near payment: Showing “Visa,” “Mastercard,” and “PayPal” icons right beside the checkout button reduces anxiety.
For example, a Vancouver outdoor gear store might test two homepage layouts: one with a full-width hero video and another with a grid of best-selling products. The version with the product grid often outperforms because it reduces the number of clicks to a purchase. CRO is not about guessing—it is about running A/B tests on real user behavior and letting data drive design changes. When you treat CRO as a design principle, you stop asking “Does this look good?” and start asking “Does this make it easier to buy?” That shift in perspective is the defining difference between a brochure and a revenue-generating ecommerce platform.
The Strategic Foundation: Planning Your Vancouver Ecommerce Website
Before a single pixel is designed or a product is uploaded, the success of your Vancouver ecommerce website hinges on strategic groundwork. A visually appealing storefront without a data-driven plan is like a flagship boutique on Robson Street with no signage—it may attract curiosity, but it will fail to convert. The pre-design phase is where you define your market position, understand your competitive landscape, and establish measurable goals that will guide every design decision, from navigation structure to checkout flow. Skipping this step often leads to costly redesigns within 18 months, as your site fails to align with actual customer behaviour or business objectives.
Defining Your Target Audience in the Vancouver Market
Vancouver is not a monolithic market. It is a city of distinct neighbourhoods, demographic clusters, and purchasing behaviours. Your ecommerce design must reflect who you serve, not just who you hope to attract. Consider the following segmentation variables unique to the region:
- Geographic micro-targeting: Downtown Vancouver shoppers prioritise convenience and speed, often expecting same-day delivery or local pickup. Suburban customers in Surrey or Langley may value bulk pricing and longer fulfilment windows.
- Cultural preferences: With over 40% of residents identifying as visible minorities, bilingual or multilingual site elements (e.g., Simplified Chinese or Punjabi) can significantly reduce friction for key demographics.
- Lifestyle values: Sustainability is not a niche in Vancouver—it is a baseline expectation. Your design must transparently communicate eco-friendly packaging, carbon-neutral shipping options, or local sourcing, perhaps through dedicated icons or a “Our Impact” page.
Build one to three detailed buyer personas with specific pain points, such as “the busy Yaletown professional who needs a reorder in under two minutes” or “the North Shore family comparing prices across three devices.” Every design element—font size, image style, mobile menu depth—should serve these personas, not your internal preferences.
Competitor Analysis: What Local Ecommerce Leaders Do Well
Your competitors are not global giants like Amazon; they are the local brands already winning the trust of Vancouver shoppers. Analyse at least five direct competitors using a structured framework. Focus on their user experience (UX) patterns, not just their product range. Look for recurring themes in their design that signal proven success in this market:
- Localised trust signals: Leading stores prominently display “Made in BC,” “Local pickup available,” or “Proudly Vancouver” badges above the fold.
- Simplified local navigation: They often feature a “Shop by Neighbourhood” filter (for food, apparel, or home goods) or a “Climate Action” category that segments eco-friendly products.
- Mobile-first checkout: The best local performers have stripped their mobile checkout to 3–4 fields, often integrating Apple Pay and PayPal, which are heavily used in the region.
Conduct a gap analysis: identify what your competitors do poorly (e.g., slow loading times, unclear return policies) and turn those weaknesses into your design strengths. Do not copy their style; instead, benchmark their functionality and exceed it in speed, clarity, and local relevance.
| Feature / Design Element | Weak Local Competitor | Strong Local Competitor | Your Target Standard |
|---|---|---|---|
| Mobile load time (3G/4G) | 8+ seconds | Under 4 seconds | Under 3 seconds |
| Local pickup option visibility | Buried in FAQ | Visible in header | Visible on homepage and product page |
| Product page content | No sizing or material details | Detailed specs + video | Specs, local shipping estimate, and care instructions |
| Checkout steps | 6+ pages | Single page with guest option | Single page, express wallet enabled |
| Returns policy clarity | Legal jargon, 14-day window | Plain language, 30-day free returns | Plain language, 30-day, with drop-off locations in Vancouver |
Setting Clear Key Performance Indicators (KPIs) for Your Online Store
Your design choices must be tied to numbers you can track from day one. Without KPIs, you are guessing which page layout, colour scheme, or product grid actually drives revenue. Define a balanced set of metrics that cover acquisition, conversion, and retention. For a typical Vancouver ecommerce launch, consider these baseline targets:
- Conversion rate: Aim for a 1.5% to 2.5% rate within the first three months. If your store sells high-consideration goods like furniture or premium outdoor gear, expect a lower rate (0.5–1%) but a higher average order value.
- Cart abandonment rate: The industry average is around 70%. Your design should target under 65% by using exit-intent popups, progress indicators, and a transparent shipping cost calculator before checkout.
- Average order value (AOV): Use design tactics such as “You may also like” cross-sells and free-shipping thresholds (e.g., “Free delivery over $75 within Metro Vancouver”) to push AOV upward by 10–15% post-launch.
- Customer acquisition cost (CAC): Your site’s speed and clarity directly affect paid ad performance. A poorly designed landing page can double your CAC due to low Quality Scores on Google Ads.
Set weekly review checkpoints for the first month. Use heatmaps (e.g., Hotjar or Microsoft Clarity) to see where users click, scroll, and hesitate. If your KPIs are not met, the issue is rarely the product—it is usually a mismatch between user intent and your design’s information architecture. Adjust navigation labels, button placement, or trust badges based on real behaviour, not assumptions.
In summary, the strategic foundation is not a one-time document; it is a living framework. Revisit your audience definitions, competitor benchmarks, and KPIs quarterly, especially as Vancouver’s market shifts with seasonal tourism, new housing developments, and changing consumer sentiment. A well-planned strategy ensures your design budget is spent on what matters: converting local traffic into loyal, repeat customers.
Essential Features for a Successful Ecommerce Website in Vancouver
Building an ecommerce site in Vancouver requires more than a pretty storefront. You are competing in a dense urban market with high expectations for speed, convenience, and transparency, while also serving customers across Canada and, often, the United States. The following features are non-negotiable for turning browsers into buyers and ensuring your backend operations run smoothly.
Mobile-First Design for On-the-Go Shoppers
Vancouver shoppers are constantly moving—commuting on the SkyTrain, waiting for coffee, or walking along the seawall. Your website must load and function flawlessly on a smartphone screen. A mobile-first approach means designing for the smallest viewport first, then scaling up to desktop. This is not just about shrinking images; it involves thumb-friendly navigation, tappable buttons of at least 44 pixels, and streamlined checkout forms that minimize typing.
Key mobile elements to prioritize:
– **Accelerated Mobile Pages (AMP)** or a lightweight theme that loads under 3 seconds on 4G networks.
– **Sticky “Add to Cart” button** that remains visible as you scroll product descriptions.
– **Tap-to-call and tap-to-email** for customer support, especially useful for local pickup inquiries.
– **Geolocation prompts** that automatically detect whether a user is in the Lower Mainland and offer local delivery or in-store pickup options.
Test your site on older iPhone models and Android devices, not just the latest flagship. If you use a platform like Shopify or WooCommerce, enable lazy loading for product images and use a content delivery network (CDN) with a node in Seattle or Vancouver to reduce latency.
Secure and Convenient Payment Options for Canadian Consumers
Canadian shoppers expect trust and flexibility at checkout. You must offer payment methods that feel native to the market. Credit cards are standard, but Interac Online and Visa Debit are widely used. For international customers, especially those from the US, include PayPal, Apple Pay, and Google Pay to reduce friction.
Security is not optional. You need an SSL certificate (HTTPS) and PCI DSS compliance. For a practical implementation, ensure your checkout uses a tokenization service so that card numbers never touch your server. A simple example in JavaScript for a Stripe-like integration (conceptual, not production-ready):
“`javascript
// Initialize Stripe.js with your publishable key
const stripe = Stripe(‘pk_test_your_publishable_key’);
// Create a payment method when the customer submits the form
const { paymentMethod, error } = await stripe.createPaymentMethod({
type: ‘card’,
card: cardElement,
billing_details: { name: customerName }
});
if (error) {
// Display error to customer
console.error(error.message);
} else {
// Send paymentMethod.id to your backend for confirmation
fetch(‘/api/charge’, { method: ‘POST’, body: JSON.stringify({ paymentMethodId: paymentMethod.id }) });
}
“`
Always display security badges (Norton, McAfee, or your payment processor’s seal) near the payment button. Also, include a clear privacy policy link and a checkout progress indicator. For Vancouver customers, offer cash on delivery only if you have a local physical presence—otherwise, stick to prepaid options to avoid fraud.
Shipping, Tax, and Duty Calculations for Local and Cross-Border Sales
Vancouver’s location creates unique logistics challenges. You will serve local customers who expect GST (5%) and PST (7%) combined into a single tax rate of 12% for British Columbia. But you may also ship to Alberta (only GST) or to Washington State (US sales tax). Manual calculations are a recipe for chargebacks and unhappy customers.
Your ecommerce platform must automatically calculate taxes based on the shipping destination. For cross-border US sales, you need to handle duty and import fees. A robust solution integrates with a shipping carrier API (e.g., Canada Post, UPS, FedEx) or a tax engine like Avalara or TaxJar.
Features to implement:
– **Real-time shipping quotes** at checkout, showing options like Canada Post Expedited (5-7 business days) versus Purolator Ground (1-3 days) with prices.
– **DDP (Delivered Duty Paid)** for US orders, so the customer sees the total cost upfront, avoiding surprise fees at their door.
– **Local pickup option** with a map and time slots, which saves shipping costs for downtown Vancouver customers.
– **Free shipping threshold** (e.g., over $100) that clearly displays a progress bar, encouraging larger carts.
For a technical example, if using WooCommerce, you can add a custom shipping method snippet to your theme’s `functions.php`:
“`php
add_filter(‘woocommerce_package_rates’, ‘custom_vancouver_shipping_rates’, 10, 2);
function custom_vancouver_shipping_rates($rates, $package) {
if ( WC()->customer->get_shipping_postcode() && strpos(WC()->customer->get_shipping_postcode(), ‘V’) === 0 ) {
// Apply a 10% discount on shipping for Vancouver postal codes starting with ‘V’
foreach ( $rates as $rate_id => $rate ) {
$rates[$rate_id]->cost = $rate->cost * 0.9;
}
}
return $rates;
}
“`
Finally, display a clear breakdown of subtotal, shipping, taxes, and any duties at the cart page—never surprise the customer at the final step. This transparency builds trust and reduces cart abandonment, which is critical in a competitive market like Vancouver.
Choosing the Right Ecommerce Platform for Your Vancouver Business
Selecting an ecommerce platform is a foundational decision that affects your store’s speed, your team’s workflow, and your bottom line. In Vancouver’s competitive retail landscape—where local shoppers expect seamless experiences and businesses often juggle bilingual needs or cross-border shipping—your platform must align with your operational reality. The right choice depends on three variables: your current order volume, your technical comfort level, and your long-term budget. Below, we break down the most common options with a local lens.
Shopify vs. WooCommerce vs. BigCommerce: A Vancouver Perspective
Each platform has strengths that resonate differently with Vancouver merchants. Consider your daily reality: do you sell at local farmers markets and need a quick POS sync? Or do you run a boutique with complex product variants?
- Shopify: Best for merchants who want a fully hosted, low-maintenance solution. Vancouver’s frequent rain and power fluctuations make uptime critical—Shopify handles hosting, security, and PCI compliance. Its app store includes local shipping integrations like ShipTime and Canada Post. Monthly fees start around $29 CAD, but transaction fees (2.9% + 30¢) apply unless you use Shopify Payments.
- WooCommerce: Ideal for those already on WordPress or wanting full control. You’ll pay for hosting (approx. $15–$50 CAD/month on Vancouver-based providers like Hivelocity or local resellers) plus domain and SSL. No monthly platform fee, but you manage updates, backups, and security. Great for custom product types, but requires comfort with PHP and plugin conflicts.
- BigCommerce: A strong middle ground—no transaction fees on any gateway, which saves money if you process high volume. Its built-in features (like multi-currency for USD sales to Washington state) reduce app dependency. However, annual sales caps (e.g., $50k on the standard plan) can force upgrades as you grow. Monthly plans start at $29 USD (~$40 CAD).
For a Vancouver startup selling handmade goods, Shopify’s simplicity often wins. For a local publisher with a blog and custom membership needs, WooCommerce offers flexibility. For a B2B wholesaler selling to US buyers, BigCommerce’s native features reduce overhead.
Custom vs. Template-Based Designs: Pros and Cons
Your design choice affects both first impressions and ongoing maintenance costs. Vancouver consumers are design-savvy, but a custom build isn’t always necessary.
| Factor | Template-Based (e.g., Shopify Theme) | Custom Design (Headless or Theme Modification) |
|---|---|---|
| Upfront cost | $0–$250 CAD (one-time) | $3,000–$15,000+ CAD |
| Time to launch | 1–3 weeks | 1–3 months |
| Uniqueness | Limited by theme’s framework | Fully tailored to your brand |
| Maintenance | Automatic theme updates | Requires developer for changes |
| Best for | New stores, tight budgets, quick validation | Established brands with specific user flows |
For most Vancouver businesses starting out, a premium template (e.g., a $200 theme from Out of the Sandbox) provides a professional look without the cost. Custom design becomes worthwhile when you need unique functionality—like a rental booking system for outdoor gear or a real-time local pickup scheduler.
Scalability and Integration Considerations for Future Growth
Your platform should grow with you, not force a rebuild. Ask these questions before committing:
- Inventory and multi-channel selling: Will you sell on Instagram Shop or at the Granville Island market? Check native integrations for POS, Amazon, and Etsy.
- Bilingual support: If you target French-speaking customers or need to translate to Mandarin for West Coast tourism, verify language apps (Shopify’s Translate & Adapt) or WooCommerce’s WPML.
- Shipping and tax automation: Vancouver’s proximity to the US border means cross-border duties. Look for real-time rate calculators (e.g., ShipperHQ) and tax tools like Avalara that handle GST/PST.
- API and headless readiness: If you anticipate a mobile app or a custom checkout, ensure your platform offers robust APIs. BigCommerce and Shopify are stronger here than basic WooCommerce setups.
A common mistake is choosing a platform purely on monthly cost. Instead, estimate your costs at 500 orders/month. Shopify’s transaction fees may exceed WooCommerce’s hosting costs, but you save on developer hours. Conversely, if you plan to add a subscription model or complex loyalty program in year two, confirm your platform’s app ecosystem supports it. Ultimately, the best platform is one you can operate confidently today while leaving room for Vancouver’s growing digital economy tomorrow.
The Impact of Visual Design and Branding on Ecommerce Success
In the digital storefront of Vancouver’s competitive market, your website’s visual design is not decoration—it is your sales floor, your product packaging, and your customer service handshake, all rolled into one. Shoppers form a first impression in under 50 milliseconds, and that judgment hinges on layout, color, and typography before a single word is read. For an ecommerce business, this means every pixel either builds or erodes trust. A polished, cohesive visual identity signals legitimacy, reduces perceived risk, and directly influences conversion rates. When a visitor feels that a brand “looks right,” they are far more likely to browse longer, add items to their cart, and complete a purchase—especially when competing against giants like Amazon, where personalized branding is often the only differentiator a small Vancouver retailer has.
Building a Memorable Brand Identity Online
Brand identity online is more than a logo—it is the consistent language of shapes, colors, and tone that repeats across every product page, checkout step, and email confirmation. In Vancouver’s saturated ecommerce scene, from outdoor gear to craft coffee, a memorable identity answers the question: “Why should I remember you?” Start with a clear brand style guide that defines your primary and secondary color palettes, iconography, and voice. Then apply these elements relentlessly:
- Logo placement: Keep it in the top-left, clickable to home, and scaled appropriately for mobile.
- Repeating motifs: Use a unique pattern or illustration style in category headers and empty cart states.
- Microcopy tone: Ensure button labels (“Add to Kit” vs. “Add to Cart”) match your brand’s outdoor or luxury positioning.
Consistency across all touchpoints—including social media graphics and packaging inserts—creates a mental shortcut for customers. When they return weeks later, they recognize your site instantly, which lowers bounce rates and encourages repeat visits.
Using Imagery and Video to Showcase Products Effectively
Text can describe a product, but imagery sells it. High-resolution photos that show scale, texture, and use-case are non-negotiable. For Vancouver brands selling locally made goods or lifestyle products, lifestyle photography that reflects the region’s mountains or waterfront can create emotional resonance. However, avoid generic stock photos—custom shots outperform them by a wide margin. Consider these practical strategies:
- Angle coverage: Provide at least 4–6 images per product: front, back, side, close-up of material, and a scale reference (e.g., a hand holding the item).
- Video loops: Short 10–15 second clips showing a product in motion (a jacket being zipped, a bag opening) increase time on page by up to 40%.
- Zoom functionality: Enable a smooth, high-resolution zoom on hover or tap, allowing customers to inspect stitching or finish.
For technical products, embed a 360-degree view or a short demonstration video directly on the product page. This reduces returns by setting accurate expectations. Remember to compress all media for fast loading—a 3-second delay can cut conversions by half, so use modern formats like WebP and lazy loading for below-the-fold images.
Color Psychology and Typography in Ecommerce Design
Color and type work silently but powerfully. Color psychology suggests that blue evokes trust (common in tech and finance), green suggests sustainability (popular in Vancouver’s eco-conscious market), and orange or red drives impulse purchases (used by clearance sections). But do not rely on clichés—test your palette against your actual audience. For example, a luxury skincare brand might use muted earth tones with gold accents, while a streetwear label could use bold black and neon. The key is contrast: ensure product images stand out against your background, and that “Add to Cart” buttons use a color that contrasts with the page’s dominant hue.
Typography affects readability and perceived quality. Sans-serif fonts like Inter or Open Sans are safe for body text on screens, but your headings can carry more personality—a geometric sans for a modern tech gadget, or a serif like Playfair Display for a boutique winery. Follow these rules:
- Limit to two typefaces: One for headings, one for body, to avoid visual chaos.
- Set a base font size of 16px or larger for body text to prevent eye strain.
- Use a scale of 1.25 or 1.333 for heading sizes to create a clear hierarchy.
- Ensure line length stays between 50–75 characters per line for comfortable reading.
Finally, test your typography on real devices—what looks elegant on a desktop may become cramped on a mobile screen. Pair your type with whitespace generously; clutter is the enemy of trust. When your color palette and typography align with your product’s story, customers subconsciously perceive higher quality, which justifies premium pricing and fosters brand loyalty.
Ecommerce Web Design Cost in Vancouver: A Detailed Breakdown
Budgeting for an ecommerce website in Vancouver requires more than a single quote. Costs vary dramatically based on your business size, product catalogue complexity, and the level of customization you need. Understanding where your project falls on the spectrum—and what drives each price point—will help you avoid sticker shock and allocate funds realistically. Below is a transparent look at current market rates, pricing models, and the recurring expenses that often catch new store owners off guard.
Average Cost Ranges for Template-Based, Custom, and Enterprise Solutions
Vancouver’s web design market offers three distinct tiers. Your choice here will determine the bulk of your initial investment.
- Template-Based (Budget to Mid-Range): $2,500 – $8,000 CAD. You purchase a pre-built theme (e.g., Shopify, WooCommerce) and hire a designer to customize colours, fonts, and layout. Best for startups and small product lines under 50 SKUs. Setup is fast (2–4 weeks), but you inherit template limitations for unique features.
- Custom Design (Mid to High Range): $10,000 – $35,000 CAD. A Vancouver agency or senior freelancer builds a bespoke user interface and user experience (UI/UX) tailored to your brand. This includes custom product pages, advanced filtering, and integration with your existing CRM or ERP. Timeline: 6–12 weeks. Ideal for growing businesses with 50–500 products and specific conversion goals.
- Enterprise Solutions (Premium): $40,000 – $100,000+ CAD. For large retailers, multi-brand stores, or B2B wholesalers. Includes headless commerce architecture, custom ERP/OMS integrations, multi-currency support, and dedicated project management. Development can span 3–6 months or longer. Expect rigorous testing, scalability planning, and ongoing optimization as part of the contract.
Note: These figures exclude taxes, content creation, and photography. A typical custom project at the lower end often doubles once you add copywriting, product data entry, and professional images.
Understanding Hourly Rates vs. Project-Based Pricing in Vancouver
How you pay for design services is as important as the total amount. Vancouver firms and freelancers use two primary models, each with trade-offs.
| Pricing Model | Typical Rate (CAD) | Pros | Cons |
|---|---|---|---|
| Hourly (Freelancer) | $60 – $150/hr | Flexible for small changes or consultations; pay only for time spent. | Final cost unpredictable if scope creeps; you manage the timeline. |
| Hourly (Agency) | $120 – $250/hr | Access to senior strategists and specialists; accountability for deliverables. | Can become expensive for open-ended revisions; requires strict scope. |
| Project-Based (Fixed Quote) | $5,000 – $50,000+ | Clear budget; agency absorbs overage on approved scope. | Change requests after sign-off incur extra fees; less flexibility mid-build. |
For a typical Vancouver ecommerce build, most reputable agencies quote a fixed price after a discovery call. This protects you from hourly overruns. However, always ask what is explicitly included—e.g., number of revision rounds, mobile responsiveness testing, and basic SEO setup. If a quote seems unusually low, confirm whether it covers custom graphics or just theme installation.
Hidden Costs: Hosting, Maintenance, Apps, and Ongoing Support
The initial design fee is rarely your final expense. Vancouver ecommerce owners frequently overlook these recurring or post-launch costs:
- Hosting & Domain: $200 – $600/year for managed Shopify or WooCommerce hosting. Enterprise cloud hosting can exceed $2,000/month for high traffic.
- SSL Certificate & Security: Often bundled with hosting, but standalone SSL costs $50 – $200/year. PCI compliance scans add another $100 – $300/month for larger stores.
- Premium Apps & Plugins: Essential add-ons (e.g., email marketing, reviews, abandoned cart recovery) range from $15 – $200/month each. A typical store uses 5–10 apps, so budget $100 – $500/month.
- Maintenance & Updates: Expect $100 – $300/month for core updates, security patches, and bug fixes. This is non-negotiable for security and performance.
- Content & Digital Asset Refresh: New product launches or seasonal campaigns often require designer time at $75 – $150/hour. Set aside $1,000 – $3,000 quarterly for banners and landing pages.
- Technical Support Retainers: Many Vancouver agencies offer ongoing support packages at $500 – $1,500/month, covering everything from checkout issues to speed optimization. This is worth it if you lack in-house technical staff.
To budget effectively, add 20–30% on top of your design quote for these hidden costs in the first year. A $15,000 custom build realistically needs $20,000 – $22,000 total for a smooth launch and first year of operation. Ask your designer for a written breakdown of what is and isn’t covered after launch—this clarity prevents unexpected invoices and keeps your ecommerce venture profitable from day one.
The Web Design Process: What to Expect from Start to Launch
A typical ecommerce web design project in Vancouver runs between 8 and 14 weeks, depending on catalogue size, payment integrations, and custom feature requirements. While every agency structures its workflow slightly differently, the process consistently falls into three distinct phases. Understanding these stages helps you allocate internal resources, plan inventory photography, and prepare your team for training without disruption to daily operations.
Phase 1: Discovery and Strategy Workshops
This opening phase—usually lasting 1 to 2 weeks—establishes the foundation for every subsequent decision. You will participate in structured workshops covering your target customer personas, product hierarchy, competitor positioning, and conversion goals. A strategist will audit your existing analytics, review your top-selling SKUs, and map required payment gateways, shipping calculators, and tax rules specific to British Columbia.
Deliverables from this phase typically include:
- A sitemap and user flow diagram showing how customers navigate from landing page to checkout
- A technical specification listing all required plugins, third-party tools, and API connections
- A content inventory identifying which product descriptions, images, and videos you must supply
- A measurable success framework (e.g., target conversion rate, average order value, and page load speed)
At the end of discovery, you will sign off on a project scope document. This prevents mid-project feature creep and keeps costs predictable. Expect two to three working sessions with your project manager, plus independent homework for your marketing team.
Phase 2: Design, Development, and Testing
This is the longest stage, consuming roughly 6 to 9 weeks. It begins with wireframes—low-fidelity layouts that confirm content hierarchy before visual styling begins. After wireframe approval, the designer produces high-fidelity mockups for your homepage, category pages, product detail pages, cart, and checkout. You should receive a clickable prototype to test on real devices before any code is written.
Development then proceeds in sprints. Your developer will build the theme, integrate your payment processor (Stripe, PayPal, or Moneris are common in Vancouver), set up shipping rules for Canada Post and local couriers, and configure tax automation. A separate staging environment lets you review changes without affecting your live site.
Testing is not a single event but an ongoing process. It includes cross-browser checks, mobile responsiveness, payment gateway sandbox transactions, and load testing for traffic spikes. The table below outlines the key quality checks you should expect before launch:
| Test Category | Specific Checks | Typical Timeline |
|---|---|---|
| Functional Testing | Cart updates, coupon codes, inventory sync, email notifications | Week 5–6 |
| Performance Testing | Page speed under 3 seconds, image compression, server response time | Week 6–7 |
| Security & Compliance | SSL certificate, PCI-DSS readiness, privacy policy, cookie consent | Week 7–8 |
| User Acceptance Testing | Your staff completes real orders, refunds, and inventory edits | Week 8–9 |
Your role during this phase is to provide timely feedback on mockups and test the staging site with real products. Delays in feedback are the most common reason projects slip past their original deadline.
Phase 3: Launch, Training, and Post-Launch Optimization
The final phase spans launch week plus 30 days of ongoing support. Before going live, your developer will configure domain DNS, migrate any existing customer data, and perform a final backup. A launch checklist ensures that 301 redirects are in place, Google Analytics is tracking correctly, and your sitemap is submitted to search engines.
Training is delivered in two or three recorded sessions, covering:
- Adding and editing products, variants, and pricing
- Processing orders, refunds, and exchanges
- Managing customer accounts and email automation
- Using the analytics dashboard for daily performance review
Post-launch optimization typically includes a 30-day monitoring period where the agency tracks conversion rate, cart abandonment, and site speed. They will fix any bugs that emerge under real traffic, and provide a prioritized list of improvements—such as upsell module placement or checkout simplification—for you to consider in the next quarter. After this period, you may choose a monthly maintenance retainer or move to an hourly support model.
Knowing this timeline upfront allows you to schedule product photography sessions, write compelling descriptions, and prepare your customer service team. A clear process reduces surprises, keeps communication transparent, and ultimately delivers an online store that is both beautiful and built to sell.
Working with a Vancouver Ecommerce Web Design Agency vs. Freelancer
Choosing between a full-service agency and a freelance designer is one of the most consequential decisions for an ecommerce project. The right choice depends on your budget, timeline, technical complexity, and long-term growth plans. Both routes can deliver a functional online store, but the process, accountability, and outcome differ significantly.
Pros and Cons of Hiring a Full-Service Agency
A full-service agency in Vancouver typically offers a dedicated team: project managers, UX/UI designers, developers, and SEO specialists. This structure is ideal for stores that need custom functionality, integrations with ERP or CRM systems, or aggressive scaling within a short period.
Pros:
- End-to-end ownership: One contract covers strategy, design, development, testing, and launch. You avoid juggling multiple vendors.
- Reliability and redundancy: If a designer is sick or leaves, another team member steps in. Deadlines are less fragile.
- Deep technical stack: Agencies can handle complex features like headless commerce, custom payment gateways, or multi-currency support.
- Post-launch support: Most agencies offer maintenance retainers, security monitoring, and performance optimization after go-live.
Cons:
- Higher upfront cost: Agency rates in Vancouver range from $150–$250 per hour, and a full build often starts at $30,000.
- Slower communication: You may wait 24–48 hours for answers because your point of contact is a project manager, not the developer.
- Less personal attention: Your project is one of many. Smaller clients can feel deprioritized.
When a Freelance Designer Might Be the Right Choice
Freelancers shine in specific scenarios. If you are launching a niche store with fewer than 50 products, have a tight budget (under $10,000), or need rapid iteration on an existing Shopify theme, a skilled freelancer can be a pragmatic match.
Typical freelance rates in Vancouver range from $60–$120 per hour. You often work directly with the person who does the work, which eliminates misinterpretation. Freelancers also tend to be more flexible with scope changes, especially if you have an ongoing relationship.
However, be cautious. A freelancer is a single point of failure. If they become unavailable mid-project, you lose momentum and context. They also rarely provide robust post-launch support unless you pay separately. For stores requiring PCI compliance audits, custom app development, or complex shipping logic, a freelancer may not have the depth to deliver safely.
One practical example: if you need to add a custom discount rule to your Shopify store, a freelancer might write a simple Liquid snippet like this:
{% if customer.tags contains 'wholesale' %}
  {% assign discount = 0.15 %}
{% endif %}
That works for a basic case. But an agency would design a discount engine that integrates with your inventory system, tests edge cases (e.g., bundles, gift cards), and documents the logic for future maintenance.
Questions to Ask Before Hiring a Web Design Partner
Regardless of which route you lean toward, vet your candidate with these targeted questions:
- What is your experience with ecommerce platforms we use? Ask for live store examples, not just portfolios. Check if those stores load fast on mobile.
- Who handles post-launch bugs and security patches? Get a written response time and cost structure for emergency fixes.
- Do you provide a detailed technical specification before coding? A vague proposal often leads to scope creep.
- How do you handle third-party integrations (payment, shipping, email marketing)? Confirm they have tested the exact plugins or APIs you need.
- What is your process for migrating existing product data and SEO rankings? A careless migration can erase years of organic traffic.
In summary, choose an agency if your store is complex, revenue-critical, or needs long-term evolution. Choose a freelancer if you have a clear, limited scope and can afford to manage the project actively. Always interview at least three candidates, ask for references from Vancouver-based businesses, and request a paid discovery session before committing to a full build.
Measuring Success and Iterating: Post-Launch Strategies
Launching your ecommerce website in Vancouver is a significant milestone, but it is not the finish line. The true measure of your investment—both in strategy and cost—emerges in the weeks and months after go-live. A successful online store is a living system that requires constant observation, hypothesis testing, and refinement. Without a structured post-launch plan, you risk losing potential revenue to friction points that are invisible from the dashboard. This phase is where you convert raw traffic into loyal customers by understanding exactly how visitors interact with your design, product pages, and checkout flow.
Tracking Key Metrics: Traffic, Conversion Rate, and Average Order Value
Your analytics platform is your primary diagnostic tool. While vanity metrics like page views are tempting, focus on three core performance indicators that directly affect profitability. First, monitor traffic sources to see whether your Vancouver-based SEO, paid ads, or social campaigns are driving qualified visitors. Second, track your conversion rate—the percentage of visitors who complete a purchase. A rate below 1% often signals usability issues, while 2-3% is healthy for most niches. Third, watch your average order value (AOV); if AOV is stagnant, your product bundling or upsell strategies need adjustment.
- Traffic quality: Use UTM parameters to distinguish between local Vancouver shoppers and broader Canadian audiences.
- Conversion rate by device: Mobile vs. desktop rates reveal if your responsive design is truly effective.
- AOV trends: Compare weekly averages to spot the impact of shipping thresholds or promotional codes.
Set up automated weekly reports that email these metrics to your team. Avoid daily checks, as short-term fluctuations can lead to hasty, unproductive changes. Instead, look for monthly patterns and investigate any sudden drops or spikes with a clear hypothesis before acting.
Using Heatmaps and Session Recordings to Understand User Behavior
Numbers tell you what happened, but they rarely explain why. Heatmaps and session recordings fill that gap by visualizing the user journey. Heatmaps show where visitors click, scroll, and move their cursors. For example, a heatmap might reveal that most users click on a product image that is not actually linked to the product page—a simple fix that could boost conversions. Session recordings, on the other hand, let you watch anonymized replays of individual visits. Pay attention to moments of hesitation, such as a user repeatedly hovering over the “Checkout” button without clicking, or abandoning a cart after seeing unexpected shipping costs.
Focus your review on three critical pages: the homepage, a top-selling product page, and the cart/checkout sequence. Look for patterns across at least 20-30 recordings before making any design change. Common issues include form fields that are too long, trust badges that are not visible above the fold, or a search bar that returns irrelevant results. Use these insights to prioritize fixes—start with anything that blocks a purchase entirely, then move to elements that cause friction but are not fatal.
Continuous Improvement: A/B Testing and User Feedback Loops
Once you have baseline data and qualitative insights, begin systematic experimentation. A/B testing allows you to compare two versions of a single element—such as a call-to-action button color, headline, or product image layout—to see which performs better. Run one test at a time, with a clear primary metric (conversion rate or AOV). Ensure your sample size is statistically significant before declaring a winner; using a tool like Google Optimize or VWO can handle the math for you. For a Vancouver ecommerce site, test locally relevant elements too, like free shipping thresholds that match competitor offers in the region.
Simultaneously, establish a user feedback loop. Post-purchase surveys, exit-intent pop-ups, and live chat transcripts provide direct quotes from customers. Ask simple questions: “What almost stopped you from completing your order?” or “What information was missing on the product page?” Combine this qualitative feedback with your quantitative test results. For example, if three users mention confusing navigation, and your session recordings show they clicked the wrong menu, then test a revised navigation structure. Schedule a monthly review meeting to evaluate all data sources, decide on the next iteration, and document what you learned. This disciplined cycle turns your website into a strategic asset that improves month over month, rather than a static brochure that slowly loses relevance.
Frequently Asked Questions
What does ecommerce web design cost in Vancouver?
In Vancouver, ecommerce web design costs vary widely based on complexity. A basic template-based store might range from $2,000 to $5,000, while a custom-designed store with advanced features typically costs $10,000 to $50,000 or more. Ongoing costs include hosting, domain, SSL, maintenance, and marketing. Always get itemized quotes and clarify what’s included—design, development, content, SEO—to avoid surprises.
How long does it take to design and launch an ecommerce website in Vancouver?
Typically, a small to medium ecommerce site takes 6 to 12 weeks from discovery to launch. Complex custom builds with integrations can take 3 to 6 months. Timelines depend on scope, content readiness, and client feedback speed. A structured process with clear milestones helps keep projects on schedule. Ask your agency for a detailed timeline upfront.
What are the key elements of an effective ecommerce web design strategy?
An effective strategy starts with clear business goals and a deep understanding of your target audience. Key elements include user-friendly navigation, mobile responsiveness, fast loading speeds, secure payment gateways, SEO-optimized product pages, and clear calls-to-action. Also integrate analytics and A/B testing to continually improve conversion rates. A Vancouver agency should also consider local market trends and consumer behavior.
Should I choose Shopify, WooCommerce, or Magento for my Vancouver ecommerce site?
The best platform depends on your budget, technical needs, and growth plans. Shopify is user-friendly and offers quick setup with monthly fees. WooCommerce (on WordPress) gives more flexibility and ownership, but requires more maintenance. Magento (Adobe Commerce) suits large enterprises needing complex customizations but has higher costs. A Vancouver web design agency can help you evaluate based on your specific requirements.
Do I need to hire a local Vancouver web design agency or can I use freelance or DIY?
Hiring a local agency offers advantages like in-person meetings, knowledge of the local market, and accountability. Freelancers can be cost-effective but may have limited bandwidth. DIY platforms are cheapest but often lack custom features and professional design. For a serious ecommerce venture, a professional agency provides a strategic approach and ongoing support, which can lead to higher ROI.
How can ecommerce web design improve my search engine rankings?
Ecommerce web design impacts SEO through site architecture, page speed, mobile-friendliness, and proper use of headings, meta tags, and schema markup. A well-structured site helps search engines crawl and index your products. Fast, secure sites (HTTPS) rank better. Also, design elements like breadcrumbs and internal linking improve user experience and SEO. Vancouver agencies often include technical SEO in their design process.
What is the typical process for ecommerce web design in Vancouver?
Typically, the process includes: 1) Discovery & strategy – define goals, audience, and scope. 2) UX/UI design – create wireframes and visual mockups. 3) Development – build the site on your chosen platform. 4) Content integration – add products, copy, images. 5) Testing & QA – check functionality, speed, and security. 6) Launch – deploy and configure analytics. 7) Post-launch support – monitor and optimize.
Sources and further reading
- W3C: Web Content Accessibility Guidelines (WCAG) 2.1
- Google Developers: Mobile-Friendly Websites
- Google PageSpeed Insights Documentation
- Shopify: Pricing & Plans
- WooCommerce: Official Documentation
- BigCommerce: Pricing & Plans
- BC Tech Association
- Small Business BC: E-commerce Resources
- Search Engine Journal: Ecommerce SEO Guide
- Content Marketing Institute: Ecommerce Content Strategy
Need help with this topic?
Send us your details and we will contact you.